
How to Audit Your Website’s SEO
We’ll be straight with you. If your website is not showing up on Google, you are losing money. You are losing customers. And you probably do not even know it is happening.
We have been doing SEO for over 10 years. We have worked with small blogs, local businesses, e-commerce stores, and even Fortune 500 companies. And the number one problem we see over and over again? Website owners have no idea what is broken on their site until it is too late.
The good news? You do not need to spend a single naira, dollar, or cent to find out. In this guide, let’s walk you through a complete SEO audit using only free tools and we are going to break it down so simply that even a 10-year-old can follow it.
What Is an SEO Audit and Why Does It Matter?
Think of your website like a car. You can drive it every day and it feels fine. But under the hood, the oil is running out, a tyre is slowly going flat, and the engine is about to give up. An SEO audit is your mechanic’s inspection it tells you what is wrong before the car breaks down completely.
An SEO audit is a full checkup of your website to find out why it is not ranking on Google (or why it could rank even higher). It looks at things like:
- Whether Google can even find your pages
- How fast your site loads
- Whether your site works on mobile phones
- If your content has the right keywords
- Whether other websites are linking to yours
- If you have any broken pages or technical errors
You do not need to understand all of that right now. That is exactly what this guide is for. I will walk you through each one, step by step, using only free tools.
By the time you finish reading this, you will know exactly why your site is invisible on Google, what is causing it, and how to fix it step by step.
Ready? Let’s get into it. But first, bookmark this page. You will want to come back to it. You can also check out our related guide on On-Page SEO Best Practices.
💡 Pro Tip: According to BrightEdge Research, 68% of all online experiences begin with a search engine. If your site is not on Google, you are invisible to more than half the internet.
Step 1: First, Check If Google Can Even See Your Website (5 Minutes)
How to Audit Your Website’s SEO
This is where most people skip straight to the fancy stuff and that is a mistake. Before anything else, you need to find out if Google knows your website exists.
Imagine writing the best blog post in the world, but publishing it in a locked room with no door. Nobody will ever read it. That is exactly what happens when Google cannot find your pages.
How to Check If Your Website Is Showing on Google
Here is the simplest test in the world. Open Google and type this into the search bar:
site:yourwebsite.com
Replace yourwebsite.com with your actual website address. For example: site:example.com
What You Will See And What It Means
If results show up: Great news. Google knows your site exists. You will see a list of pages from your website. The more pages, the better.
If ZERO results show up: This is a red flag. It means Google has not indexed your site at all. Your website might as well not exist on the internet.
⚠️ Important: If Google shows zero results for your site:search query, do not panic. Keep reading. We will fix this in Step 4 of this guide.
Other Signs Your Website Is Not Showing on Google
- You type your business name in Google and your site does not appear — even in the first few pages
- You get no organic (free) traffic from search engines
- When you search for your main keyword, your competitors show up but you do not
- Google Search Console shows zero impressions (we will explain this tool shortly)
💡 Pro Tip: Open an Incognito/Private window in your browser before searching. Your browser sometimes shows you your own site higher than it actually ranks because of your search history.
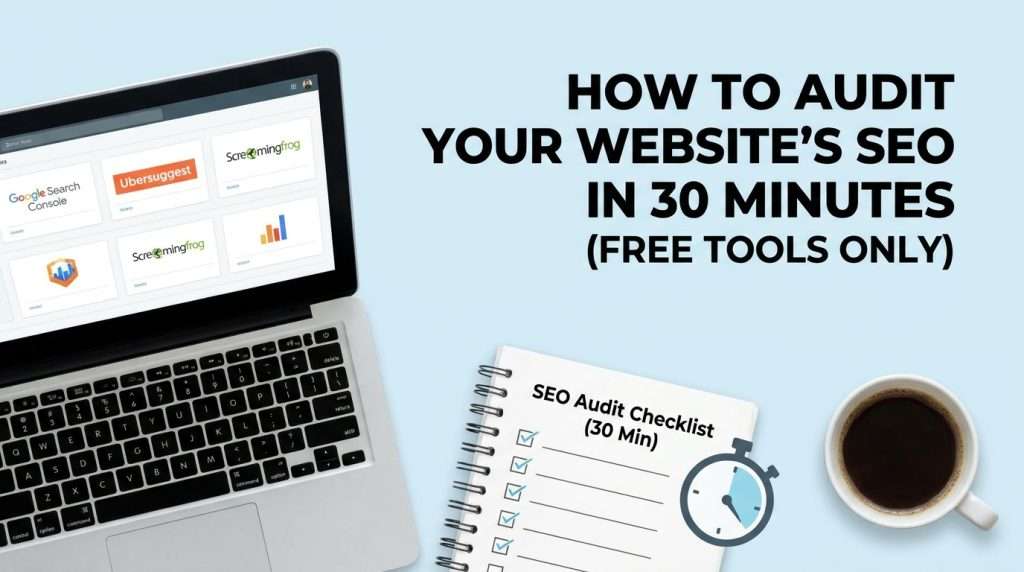
Step 2: Set Up These Free Tools Before You Do Anything Else (5 Minutes)
You would not try to build a house without measuring tape and a hammer. The same applies here. These free tools are your SEO measuring tape. Set them up now.
The 7 Best Free SEO Audit Tools
|
Tool |
Best For |
Cost |
|
Google Search Console |
100% Free |
|
|
Google Analytics 4 |
100% Free |
|
|
Ubersuggest |
Free (limited) |
|
|
Screaming Frog |
Free version |
|
|
GTmetrix |
100% Free |
|
|
MozBar |
Free extension |
|
|
Ahrefs Webmaster |
Free (verified sites) |
|
How to Set Up Google Search Console (Most Important Tool)
Go to Google Search Console and sign in with your Google account.
- Click ‘Add Property’ and enter your website URL
- Choose ‘URL Prefix’ and paste your full site address (including https://)
- Download the HTML verification file Google gives you
- Upload it to your website’s root folder (most hosting platforms like WordPress let you do this via the file manager or a plugin like Yoast SEO)
- Click ‘Verify’ and you’re in
It takes about 24 to 72 hours before Google Search Console starts showing you real data. So set it up today and come back to check it tomorrow.
💡 Pro Tip: If you use WordPress, the free Yoast SEO plugin can verify Google Search Console for you in about 2 clicks. No file uploading needed.

Step 3: Run a Technical SEO Check (8 Minutes)
Technical SEO sounds scary. It is not. Think of it like this: if your website is a shop, technical SEO is making sure the shop has a proper entrance, the lights work, and customers can actually walk through the door. If the door is broken, nobody gets in no matter how great the products inside are.
3a. Check Your Indexing Status in Google Search Console
Once your Search Console is set up, here is what to look at first:
- Pages report: Go to Indexing > Pages. This shows you how many pages are indexed (visible on Google) vs. not indexed.
- Coverage issues: Any pages marked ‘Excluded’ or ‘Error’ need your attention. Common problems include ‘Crawled – currently not indexed’, ‘Blocked by robots.txt’, or ‘Redirect error’.
- Sitemaps: Go to Indexing > Sitemaps. Submit your sitemap if you have not already. For WordPress sites, your sitemap is usually at yourwebsite.com/sitemap.xml
⚠️ Important: If your sitemap shows 50 pages submitted but only 10 are indexed, you have an indexing problem. Google is ignoring most of your content. This needs fixing immediately.
3b. Check Your Site Speed with GTmetrix
Site speed is a confirmed Google ranking factor. A slow site = lower rankings = fewer visitors. Go to GTmetrix.com and enter your website URL.
Here is what the scores mean:
- Grade A or B (90-100): Your site is fast. No major issues.
- Grade C (70-89): Room for improvement. Might be hurting your rankings slightly.
- Grade D or below (under 70): This is a problem. Google may be pushing your site down in results because of slow loading.
The most common causes of slow sites:
- Images that are too large (the #1 culprit for most websites)
- Too many plugins or apps installed
- Cheap shared hosting that cannot handle traffic
- No caching set up
💡 Pro Tip: Use a free tool like TinyPNG (tinypng.com) to compress your images before uploading them to your site. A 2MB image can often be reduced to 200KB without any visible loss in quality.
3c. Check If Your Site Is Mobile-Friendly
More than 60% of Google searches now happen on mobile phones. If your site looks broken or hard to use on a phone, Google will rank you lower. Use Google’s free Mobile-Friendly Test to check.
Just enter your URL and Google will tell you within seconds if there are problems. Common issues include text that is too small to read, buttons that are too close together, and content that is wider than the screen.
3d. Check for Broken Links with Screaming Frog
Download the free version of Screaming Frog SEO Spider. This tool crawls your website the same way Google does and flags any broken pages (404 errors), redirect chains, missing title tags, and duplicate content.
To use it:
- Download and open Screaming Frog
- Type your website URL into the search bar at the top
- Click ‘Start’ and let it crawl your site
- When it finishes, click the ‘Response Codes’ tab
- Filter by ‘4xx’ errors these are your broken pages that need fixing
The free version crawls up to 500 URLs which is more than enough for most small and medium-sized websites.
Step 4: Fix the 1 Reason Google Is Not Showing Your Site (3 Minutes)
If the site:yourwebsite.com search returned zero results earlier, here is what to check and fix:
Check If Your Site Is Accidentally Blocking Google
This sounds crazy but it happens more than you think. Many website builders and WordPress sites have a setting that says ‘Discourage search engines from indexing this site.’ Website developers sometimes turn this on during building and forget to turn it off.
If you use WordPress:
- Go to Settings > Reading
- Look for the checkbox that says ‘Discourage search engines from indexing this site’
- Make sure that box is UNCHECKED
- Click Save Changes
⚠️ Important: I have seen websites lose thousands of pounds in revenue because someone checked this box during a website rebuild and forgot about it for months. Check this RIGHT NOW.
Submit Your Site to Google Manually
In Google Search Console, go to the URL Inspection tool. Type in your homepage URL and click ‘Request Indexing.’ This tells Google to come crawl your site immediately instead of waiting. Also go to Google’s URL Inspection Tool directly for this.
For new websites, also consider submitting your site to Bing using Bing Webmaster Tools it is free and helps you get traffic from Bing and Yahoo as well.
Check Your robots.txt File
Your robots.txt file is a small file that tells search engines which pages they are and are not allowed to visit. If this file has the wrong instructions, it can block Google from your entire website.
To check it, simply type this into your browser:
yourwebsite.com/robots.txt
Bad: If you see ‘Disallow: /’ with nothing else, that is telling Google to stay away from your entire site.
Good: A healthy robots.txt usually has just a few lines and does not block major pages.
Technical SEO gets you on the road. On-page SEO is what gets you to the destination. This is about making sure the words, headings, and structure of your pages match what people are actually searching for.
Check Your Title Tags and Meta Descriptions
Every page on your website should have a unique title tag and meta description. These are what people see in Google search results.
- Title tag: Should be 50–60 characters long, include your main keyword, and clearly describe what the page is about.
- Meta description: Should be 150–160 characters, include your keyword naturally, and give people a reason to click on your link.
To quickly check all your title tags and meta descriptions at once, use the free Screaming Frog we mentioned earlier. After crawling your site, click the ‘Page Titles’ or ‘Meta Description’ tabs to see which pages are missing these or have them wrong. You can also check individual pages using SEOptimer’s free page analysis tool.
💡 Pro Tip: Do not stuff keywords into your title tag. Write it for humans first, search engines second. A good title tag reads naturally and makes people want to click.
Check Your Headings (H1, H2, H3)
Headings are like the chapter titles in a book. They help Google understand what your page is about and help readers find what they need quickly. Here is the simple rule:
- Every page should have exactly ONE H1 heading this is usually the page title
- Use H2 headings for main sections
- Use H3 headings for sub-sections within those sections
- Your main keyword should appear in your H1 naturally, not forced
To check headings on any page, right-click on the page in Chrome, select ‘Inspect’, and search for ‘h1’, ‘h2’, etc. Or use the free MozBar Chrome extension which highlights all heading tags on any page with one click.
Check Your Keyword Usage
Your main keyword should appear naturally throughout your content. A good rule of thumb is to aim for a keyword density of around 1–2%. So for a 1,000-word article, your main keyword should appear roughly 10–20 times. Use a free tool like Keyword Density Checker to check this.
Also check that your keyword appears in the first 100 words of your article, in at least one image alt tag, and in your URL slug. For more advanced keyword research, the free version of Ubersuggest is excellent for finding what people are actually searching for in your niche.
Audit Your Images
Images slow down your website AND they are a missed SEO opportunity if you do not optimize them. For every image on your site:
- Add alt text: This is a short description of what the image shows. It helps Google understand your images and helps visually impaired users. In WordPress, you can add alt text when you upload an image.
- Use descriptive file names: Name your image ‘seo-audit-checklist.jpg’ not ‘IMG_00342.jpg’
- Compress them: Use TinyPNG or Squoosh.app (free) to reduce file size before uploading
Backlinks are links from other websites pointing to yours. Think of them as votes of confidence. When a respected website links to yours, Google sees that as a sign that your content is worth showing to people.
To check your backlinks for free, use Ahrefs Free Backlink Checker. Just enter your URL and it shows you the top 100 backlinks pointing to your site.
Here is what to look for:
- Domain Rating (DR): A score from 0–100 showing how strong your backlink profile is. Higher is better. Most new sites start at 0–10. Getting above 30 takes real effort and good content.
- Number of referring domains: The more unique websites linking to you, the better.
- Toxic links: Links from spammy or suspicious websites can actually HURT your SEO. If you see backlinks from obviously shady sites, note them down you can disavow them in Google Search Console later.
💡 Pro Tip: The best free way to build backlinks is to write genuinely useful content that other people want to reference and share. Guides like this one, original research, and free tools attract natural backlinks over time.
Here is your full checklist, ready to print or save. Go through each item one by one:
STEP 1 — VISIBILITY CHECK (5 min)
- Run site:yourwebsite.com in Google confirm pages are indexed
- Check Google Search Console for indexing errors
- Confirm robots.txt is not blocking Google
- Verify ‘Discourage search engines’ is unchecked in WordPress settings
STEP 2 — TECHNICAL SEO (8 min)
- Test site speed with GTmetrix — aim for Grade B or above
- Run Mobile-Friendly Test — confirm no errors
- Crawl site with Screaming Frog — fix 404 errors
- Submit/check sitemap in Google Search Console
STEP 3 — ON-PAGE SEO (7 min)
- Check all pages have unique title tags (50–60 chars)
- Check meta descriptions are present (150–160 chars)
- Confirm each page has one H1 with main keyword
- Check keyword appears in first 100 words of content
- Add alt text to all images
- Check image file sizes — compress anything over 200KB
STEP 4 — OFF-PAGE SEO (2 min)
- Check backlinks using Ahrefs Free Backlink Checker
- Note any suspicious or toxic backlinks for disavowal
- Record your current Domain Rating as a baseline
Now you have data. Now comes the part most people skip — actually fixing things. Here is how to prioritize:
- Fix indexing problems first. If Google cannot see your site, nothing else matters. Address robots.txt issues, submit your sitemap, and request indexing via Search Console before anything else.
- Fix technical errors second. Speed and mobile-friendliness are confirmed ranking factors. A broken, slow, or mobile-unfriendly site will never rank well, no matter how good the content is.
- Fix on-page issues third. Once Google can access and understand your site, make sure your content is properly optimized with the right keywords, headings, and meta information.
- Build backlinks last. Off-page SEO matters, but it has limited impact if your technical and on-page foundation is broken.
After making changes, give Google 2 to 4 weeks to recrawl and re-evaluate your site. Monitor your progress using Google Search Console and Google Analytics. If you want to go deeper into any of these areas, read our guides on Technical SEO for Beginners,
How Long Until You See Results?
I want to be honest with you here because too many people give up too early or get taken advantage of by agencies promising overnight results.
Here is a realistic timeline:
- Week 1–2: Fix technical issues. Submit sitemap. Request indexing. Google starts recrawling.
- Week 3–4: Google Search Console starts showing impressions. You may see early movement on very specific, low-competition keywords.
- Month 2–3: If you are consistently publishing good content and fixing SEO issues, you should start to see real traffic improvements.
- Month 4–6: For competitive keywords, this is when serious traction usually begins.
⚠️ Important: Anyone who promises you Page 1 results within a week is lying. SEO is a long game. But the results last much longer than paid advertising and they are free.

Best Brand Tech
Website Design | Grahics Design | Search Engine Optimization | Business Registration (CAC) | IT Support